What Is Murf? A Simple Guide to AI Narration, Features, Pricing, and Getting Started
Murf lets you divide scripts into blocks and fine-tune voices and delivery. Learn how free trials differ from exports, how to read the pricing, and how to create a short explainer voiceover.
Information checked: November 5, 2026. Features and pricing were checked against the text on official pages. Pricing is based on the annual billing information on the official Text to Speech page. We have not tested the software or audio quality firsthand.
Introduction
You want to turn a training video or product explanation script into clear, easy-to-follow narration. Beyond generating a voice, you also want to adjust the pauses and delivery of each sentence. Murf is one option for creating AI speech from a script and refining it while reviewing the audio and visuals together. Its official help documentation outlines a Studio workflow covering scripts, voices, media, playback, and export. Studio overview
When trying Murf, keep the distinction between listening to voices for free and saving a finished file in mind. Focusing on Murf Studio, this article explains how to divide a script, adjust voices, understand pricing conditions, and create your first audio.
What Is Murf?
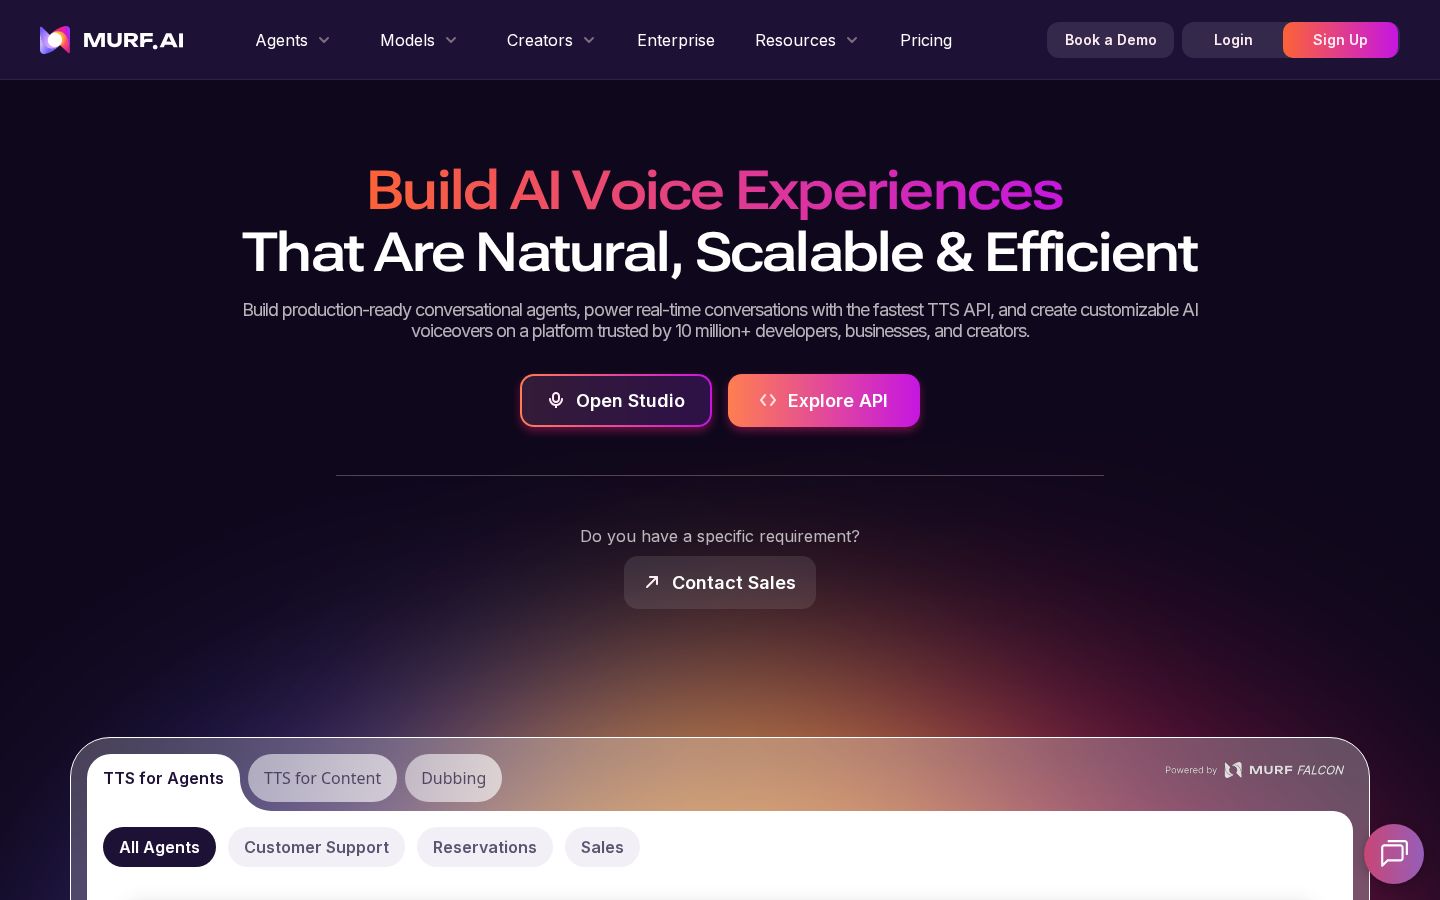
Murf is a service offering AI voice production, a voice API, conversational agents, and other products. This article covers how to use Studio to create narration from a script, rather than the speed or per-unit pricing of its developer API. Murf’s official website
In Studio, you enter a script, choose a language and voice, and adjust pronunciation, speed, pitch, pauses, and other settings. The official Text to Speech page lists languages including Japanese. However, whether Japanese is available and whether your own script is read the way you intend are separate things to check. Introduction to Text to Speech
The TOOLPORT editorial team recommends choosing a tool with the accompanying screens or materials in mind, as well as assessing the narration itself. For an instructional walkthrough, the time spent showing where to click needs to match the length of the spoken explanation. Mapping the script to the visuals first makes it clearer what you need to adjust.
What You Can Do: Key Features
Divide a Script into Blocks for Editing
Murf’s official help documentation explains how to organize scripts into blocks corresponding to paragraphs and sub-blocks corresponding to sentences. You can split a pasted script by paragraph or sentence, then adjust the order and settings. Structuring a script
For example, the editorial team would divide an instructional walkthrough into “Preparation,” “Operation,” and “Checking the results.” This organizes the script by scene instead of treating it as one long passage. It also makes the surrounding context easier to check when you need to revise a word or phrase.
Smaller divisions are not always better. Look at how the sentences fit together so that a complete thought is not cut off halfway through. Use changes in steps, speakers, or screens as cues to decide which parts to review as a single unit.
Narrow Down Voices and Refine Each Sentence’s Delivery
Studio’s voice library lets you narrow down options by language, accent, age group, use case, and other criteria, then preview voices before applying them. The text editor includes settings for speed, pitch, pauses, pronunciation, and more. Studio’s workspace areas
We recommend comparing voices using the same script. Listen for whether the delivery remains comfortable to follow through to the end, whether numbers are clear, and whether important terms get lost. Go beyond your first impression of a voice and test it with material close to what you will actually use.
Make the purpose of each adjustment specific, too. Instead of simply aiming to make it “more natural,” think, “I want to give viewers time to check the screen before this action.” This makes it easier to choose the changes you need. After changing a setting, listen again to the surrounding passages as well as the edited section.
Create Explanations with Multiple Speakers
The official help documentation explains how to give each character separate blocks and assign a voice to each one. You can copy settings to other blocks, and there is also a way to combine everything into a single audio file. Official guide to multiple speakers
One use case suggested by the editorial team is a short lesson that alternates between questions and answers. Assigning separate voices to the questioner and the person explaining lets you try a structure different from a script intended for reading. Still, judge whether separate speakers make the content easier to understand, rather than adding voices for their own sake.
Also check that a character’s voice and speaking style remain consistent throughout. If you use multiple characters, adding speaker names to the script and deciding who handles each block in advance gives you a clear reference for review.
Check How Speech, Background Audio, and Visuals Work Together
Studio’s timeline lets you review voice blocks, media, and background audio, and adjust their placement, volume, and other settings. Projects that use video or images also have a preview for reviewing them alongside the narration. Timeline and preview
If you add music, check that a voice that sounded clear on its own is still easy to understand in the finished piece. Pay particular attention to places where short, important terms, such as numbers or action names, overlap with other sounds. After refining the visuals and audio separately, you need to review them together.
Pricing Plans
Check the Official Annual Billing Information
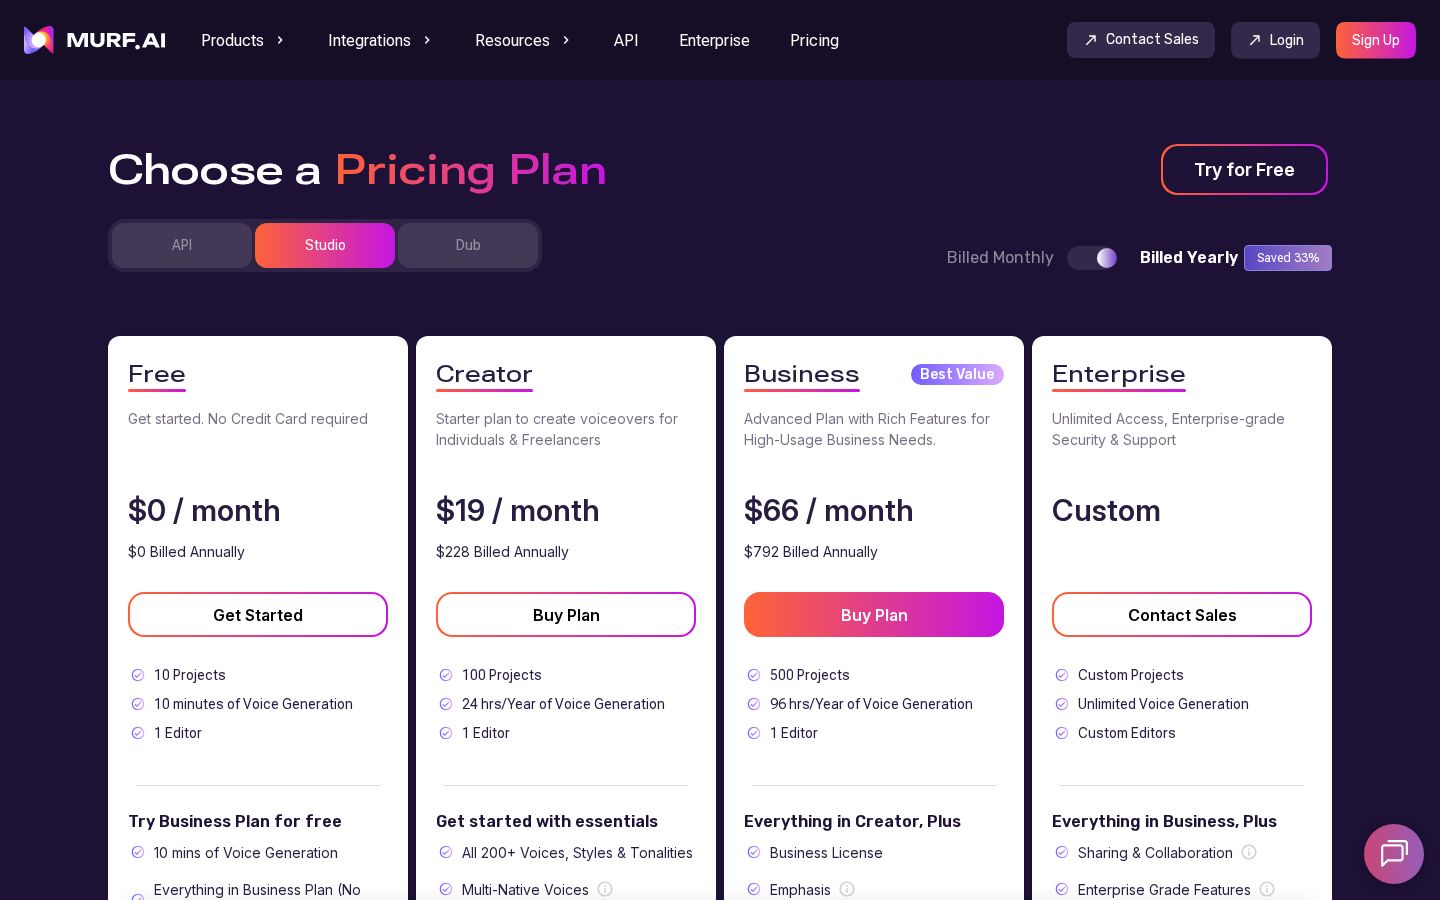
As of November 5, 2026, the FAQ on the official Text to Speech page listed the following prices. Creator and Business are starting prices expressed as monthly equivalents with annual billing. These should be distinguished from the prices for monthly subscriptions. Official FAQ with pricing
Plan | Price Listed in the Official FAQ | What to Consider |
|---|---|---|
Free | US$0 | Enter a script to try the voices and controls |
Creator | From US$19 per month, billed annually | Your individual production volume, saving conditions, and required features |
Business | From US$66 per month, billed annually | Features and subscription terms needed for business use |
Enterprise | Contact for pricing | Collaboration and organizational requirements |
When we tried to retrieve the dedicated pricing page directly, it returned only a notice that JavaScript was required, so we could not review the full current subscription interface. The table above is limited to the information we could verify on the product page; we have not estimated the final annual charge or the total including tax. Before subscribing, check the billing cycle, currency, taxes, and usage allowances. Pricing page
A Free Trial Does Not Necessarily Include Saving Files
The official help documentation describes downloading and exporting Studio projects as paid-plan features. The free trial is intended for trying voices and features with sample scripts. The product page lists 10 minutes of voice generation as the free allowance. Saving conditions for the free trial, Free allowance details
During your free evaluation, focus on whether there is a voice that suits your script and whether you can check and correct important terms. If you need to deliver a file, check the output conditions before proceeding with production. The key is to distinguish being able to edit a project from being able to deliver it in the required format.
Consider Generation Time and Stored Project Limits Separately
The official help documentation describes the project allowance as the number of projects you can keep in a workspace, rather than a fresh allocation added each month. This is separate from the voice generation time allowance. Project allowance explained
The editorial team recommends listing your monthly audio production volume and the number of projects you want to keep separately. Your allowance needs will differ depending on whether you use short audio clips across many projects or create one long lesson. Also consider how you will retain projects that need frequent revisions.
The official pricing-related pages and workspace help documentation contain differing information about plan names and the number of projects you can keep. This article therefore does not list specific storage limits that we could not verify consistently. Check the details for the plan you are selecting, rather than combining numbers from different comparison tables. Workspace explained
How to Use Murf: Turn a Short Walkthrough into Audio
This workflow follows the official production guide. The walkthrough below is a practice example from the editorial team, not a review of audio we actually generated.
1. Prepare the Script You Want to Turn into Audio
Choose a short instructional walkthrough for your first project. For example, use three scenes: “Open the screen,” “Select an item,” and “Check the results.” Note beside the script what you will show while each line is spoken.
Also identify any differences between the on-screen text and the spoken wording. If you use abbreviations, consider whether to explain what they mean when they first appear. Review numbers and units to make sure they are understandable by ear as well as in writing. Deciding which terms to check before you start gives your listening review a clearer focus.
2. Add the Script to a New Project
The official guide describes creating a new project in the workspace, then typing or pasting a script, or importing it from a supported file. The script is organized into voice blocks for editing. Basic production steps
For this example, organize the three scenes so that each can be reviewed separately. Planning clear names such as “Preparation,” “Operation,” and “Check” makes it easier to locate sections that need changes later. Start by checking for missing or duplicated text.
The official structuring guide includes options for dividing text by paragraph or sentence. Avoid mechanically splitting up passages that form a continuous explanation; organize them into units that let listeners follow the meaning. Script division settings
3. Choose a Voice and Set Shared Settings
Choose a voice based on language, accent, speaking style, and other criteria. The official guide also explains how to apply settings chosen for one block to selected blocks or the entire project. Voice selection and settings workflow
The editorial team recommends first establishing a reference delivery in one scene. Consider how calm it sounds, its pace, and how sentences end, then choose an approach that fits your purpose. After applying it to other scenes, check that it remains easy to follow even when sentence lengths change.
Consistent settings do not mean every passage needs identical pauses. Distinguish scenes that need a brief pause before an important explanation from those where short instructions should flow one after another. Adjust for both overall consistency and clarity within each scene.
4. Listen to Individual Sections and the Whole Project
The official help documentation outlines how to play and review sub-blocks, blocks, and the entire project. How to preview audio
Start by focusing on short sections containing numbers or technical terms. Then play the whole project to check that the steps flow naturally. A sentence may sound fine on its own, yet have an overly long pause or feel rushed when heard in context.
If the project includes video, check that the item being explained is visible on screen and that viewers have time to see what changes after an action. Avoid removing necessary conditions simply to shorten the audio. Instead, adjust by deciding which information the screen will convey and which information the voice will explain.
In this practice example, leave enough time after “Select an item” for the selection result to be seen. We recommend using the listener’s ability to follow the action as your guide, rather than trying to fit everything in by increasing the speaking speed.
5. Export in the Required Format and Check the Finished Audio
Paid plans list audio output options including MP3, WAV, and FLAC. The official help documentation also describes quality settings and mono or stereo options. Choose according to the format and requirements of the intended destination. Exporting audio
During the free trial, evaluate playback and editing in Studio without assuming you will be able to save the finished output. If you export on a paid plan, open the saved audio and check its beginning, ending, scene transitions, and volume. Treat the on-screen preview and the file you will actually use as separate checks.
For work that involves revisions, we also recommend keeping the script and finished audio together as a pair. Recording which sentences changed lets you narrow the scope of your next review. When handing files to a client or colleague, use names that clearly identify the final version.
Who Murf Is and Is Not Suited For
The following is the editorial team’s assessment based on the official features and terms of use.
A good fit for
- People who want to divide scripts by scene and create narration.
- People who want to review and refine delivery for each speaker or sentence.
- People who want to align the timing of visuals, background audio, and voices.
Not a good fit for
- People who want to download finished audio using only the free trial.
- People who do not want to include a review stage for pronunciation and pauses.
- People who want to choose a subscription without distinguishing generation time from the number of projects they can keep.
How Murf Differs from Similar Tools
ElevenLabs also generates speech from text and offers voice and model selection. With Murf, Studio’s workflow for dividing scripts into blocks and refining delivery and timing is a factor to consider. ElevenLabs’ official guide, Script editing in Murf
Both tools offer features for refining audio, so this article does not make a definitive judgment about which has better quality. We recommend comparing them with the same short script, checking whether you can correct pronunciation as needed, manage multiple scenes easily, and save files under conditions that suit your use case.
Things to Keep in Mind
People Still Need to Define Each Speaker’s Role
When using multiple voices, decide in advance who asks questions and who explains. The editorial team recommends preparing a script with clear roles instead of repeating the same explanation in different voices. Listen through the full piece at the end to judge whether the voice changes help people understand the content.
Check the Source Audio Transcription Feature Separately
Murf’s Audio to Text transcribes audio or video and converts it into AI speech. The official help documentation says it uses both transcription time and voice generation time. Its usage allowances therefore need to be considered differently from the text-entry workflow covered here. Audio to Text explained
If you want to work with prerecorded material, check the applicable plans and import methods separately. The final output you need will also differ depending on whether you only want a transcript or want to replace the voice.
Conclusion
Murf is an option for people who want to create finished narration by dividing a script and adjusting voices and delivery. Start with a short instructional walkthrough to try editing individual blocks and listening to the whole project. Separating free evaluation from paid saving, and considering plans in terms of generation volume and stored project count, will help you make a decision.
Sources (Page Text Checked on November 5, 2026)
- Murf’s official website: Product categories.
- Text to Speech: Japanese-language support, free allowance, and starting prices with annual billing.
- Studio overview: Voices, editor, and timeline.
- Production steps: Creating a project, entering text, configuring settings, and previewing audio.
- Structuring a script: Blocks and sub-blocks.
- Multiple speakers: Assigning voices.
- Saving conditions for the free trial: Download restrictions.
- Projects, Workspace: Stored project allowances and differences in the information provided.
- Voice Export: Formats and quality.
- Audio to Text: Usage allowances for this separate feature.
- ElevenLabs guide: Tool used for comparison.