What Is Framer? AI Website Builder Features, Pricing, and How to Publish
Explore Framer’s AI Agent, editing canvas, CMS, and pricing, with steps to build a small site, check its mobile layout, and confirm where it’s published.
Information checked: November 5, 2026. This article is based on a review of the text on official pages. We did not build a site in Framer, subscribe to a plan, or publish a site. Prices are in US dollars and refer to the annual billing rates shown.
Introduction
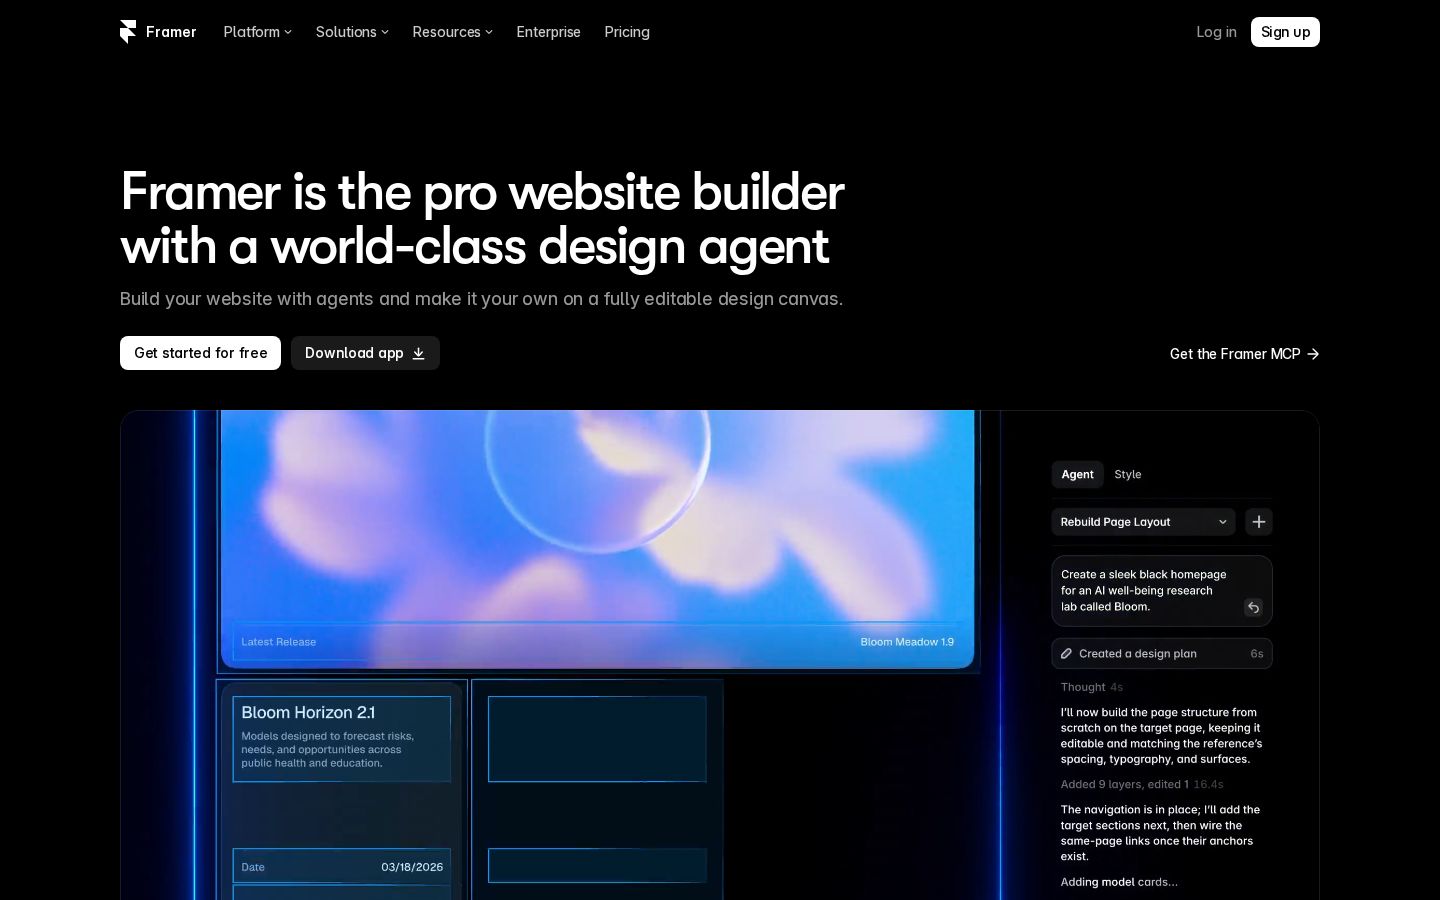
You want to build a site for your services or a portfolio, but learning separate systems for everything from adjusting the layout to publishing can be daunting. Framer is a service that covers website creation through publishing using AI prompts and visual editing. Its official website shows a workflow in which you refine what the Agent creates on an editable canvas. Framer official website
The key is to distinguish between getting the initial design into shape and creating a site that visitors can use. Using a small site as an example, this article explains the features and pricing, how to refine the content, and what to check before and after publishing.
What Is Framer?
Framer is a website building service that handles page design, reusable components, CMS content, layouts for different screen widths, and publishing settings. Its official interface guide explains the main areas: Canvas, CMS, Localization, Analytics, and Settings. Interface overview guide
It helps to understand each area’s role: create the design in Canvas, organize articles and other content in CMS, and review site-wide settings in Settings. You do not need to use everything from the start.
Our editorial team recommends starting with a clearly defined project, such as a one-page introduction site. Deciding who you want to reach, what you want to tell them, and what you want them to do at the end gives you a shared basis for choosing the design and checking how the site works.
For example, a portfolio site needs to show your work, your role in each project, and a way to get in touch. Large images alone may not give potential clients enough information to make a decision. Think about how to use creative freedom to make the information easier to understand.
What You Can Do: Key Features
Ask the AI Agent for Help with Structure and Design
The official introductory lesson walks through starting with an empty project, explaining the site you need to the Agent, and creating pages, navigation, CMS content, components, and layouts for different screen widths. Once generated, you can review the content on the canvas. Build your first site
Include details about your business or activities, the pages you need, the photos you will use, and the look and feel you want in your initial prompt. In our editorial team’s example, we would start with the purpose—“a site where people considering an inquiry can read about past work and the scope of services”—then list the necessary elements.
It is also important not to use AI-generated text as a description of your own track record without reviewing it. Replace any fictional client names, figures, or awards with verifiable information, or remove them. Even if you use the generated layout, check the facts you publish separately.
Adjust Text and Spacing on the Canvas
Framer’s official guide explains how to view pages, layers, and Assets, and edit selected elements. It also describes making small changes to text, colors, and spacing directly on the canvas. Interface
Our editorial team recommends first making the roles of different text elements consistent. When the page’s main topic, section headings, body copy, and notes are clearly distinguishable, it becomes easier to establish a reading order. Before adding decoration, check whether the most important content catches the eye first.
Also check whether buttons and headings with the same role vary from page to page. Identifying what should stay consistent and what should change to suit the content makes future revisions easier to plan.
Manage Content with a Shared Structure in the CMS
The CMS organizes information with common fields, such as articles, case studies, and team profiles. The official lesson explains how to add an Item to a Collection, define a Field for information such as a title or image, and connect the content to a shared layout. CMS basics
For a case study, possible fields include the project name, image, description, your role, and publication date. Our editorial team suggests starting with a few real examples and separating the fields you always need from those that may not apply to every project.
Do not decide whether to use the CMS based only on the amount of content. It is worth considering when you will regularly add information in the same format, while a regular page may be enough for a short description that appears only once. Consider the work involved for the person responsible for updates.
Check Layouts at Different Screen Widths
In preview, you can change the screen width to check the layout and behavior. You can also select a specific breakpoint before opening the preview. The official help explains that custom code added through settings does not appear in preview and must be checked on the published site. How to use preview
Our editorial team recommends checking more than just the preset sizes. Gradually change the width to see whether headings wrap awkwardly or images and text overlap. Visitors’ devices are not limited to a single width.
On smartphones, check the reading order as well as the text size. When content arranged side by side becomes stacked vertically, make sure the relationship between descriptions and images remains clear and that visitors can read the necessary information before reaching a button.
Pricing Plans
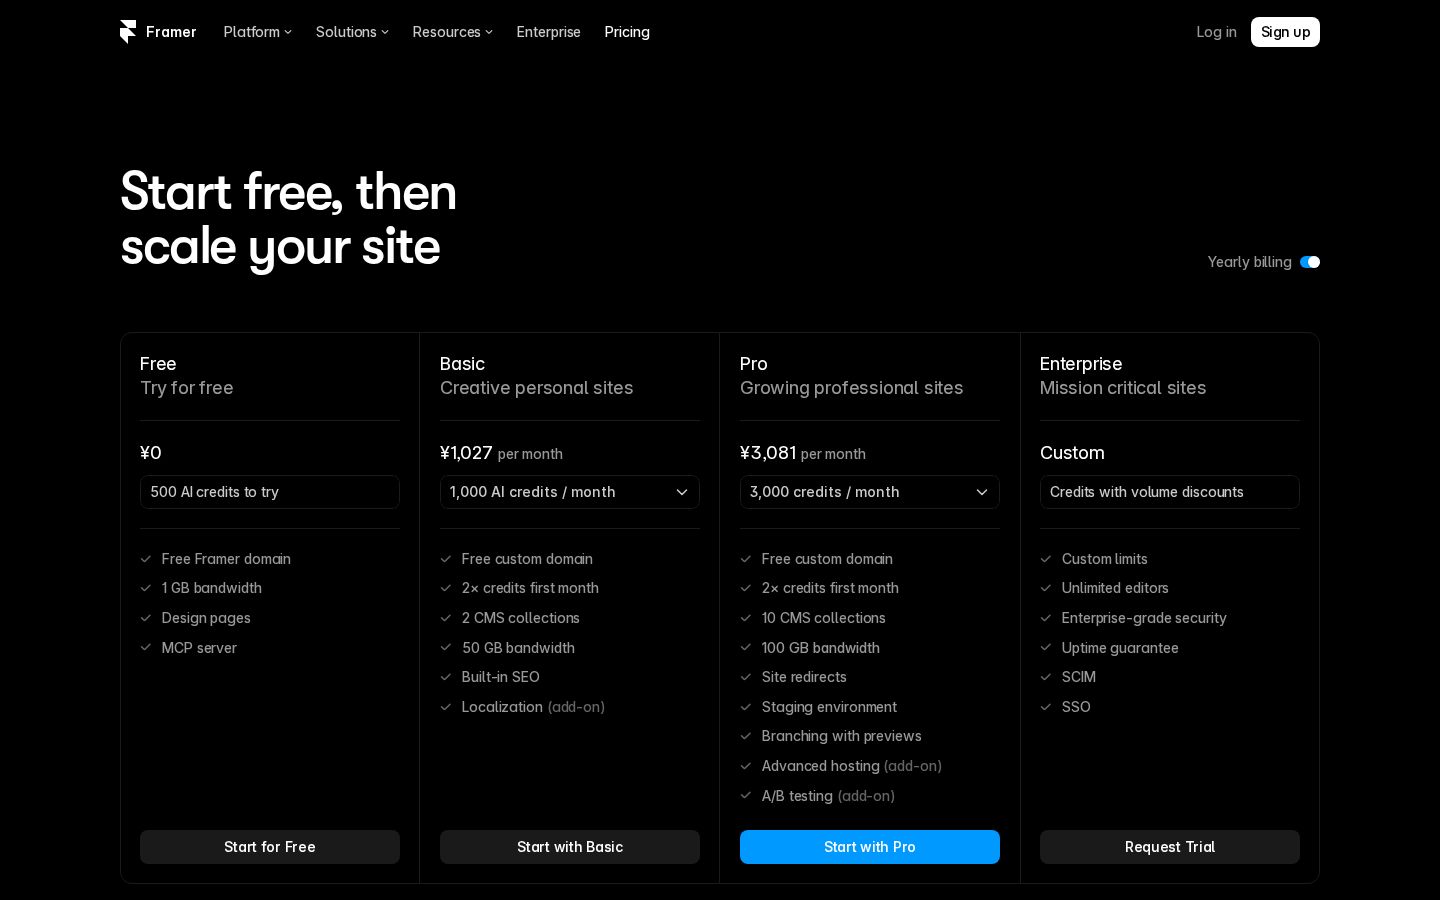
The pricing page we checked was set to Yearly billing. Basic costs the equivalent of $10 per month, Pro costs $30, and Enterprise has custom pricing. There is also a free plan that lets you try the service on a Framer domain. Official pricing
Plan | Monthly Equivalent When Billed Annually | Key Features Noted |
|---|---|---|
Free | $0 | Framer domain and trial AI credits |
Basic | $10 | Custom domain, 2 CMS Collections, and more |
Pro | $30 | 10 CMS Collections, staging, and more |
Enterprise | Custom pricing | Organization-level management and custom terms |
The pricing page also lists separate charges for additional editors, content editors, localization, and extra features. Do not treat the base site price as the total cost; consider who will edit the site and what you will add.
At the time of our review, the free AI allowance was described as “500 to try it out.” Do not assume this means the same amount is provided every month. Check your remaining balance and the conditions for replenishing credits in the interface. The Agent allowance is also separate from limits on site pages and traffic.
Our editorial team recommends first counting the pages and types of CMS content you need. The structure will differ depending on whether you want to manage articles and case studies separately or simply keep them in a single list. Choose based on what you plan to publish now and how you expect to update it, rather than only imagining the largest possible future site.
For custom domains, distinguish between the ability to connect a domain and the cost of registering and renewing it. Framer also offers a domain benefit with annual billing, but eligibility and registration provider conditions apply, so do not assume that every domain you want will be free. Connecting a custom domain
If you hire someone to build the site, also decide who will change the text and images after publication. Identifying who only needs to view the site, who will edit content, and who will manage the whole site makes it easier to compare the seats and permissions you need.
Step-by-Step Guide: Build a Small Introduction Site
This section draws on the official introductory lessons to explain the process from building a site to checking it after publication. We did not create a site in Framer or publish one externally for this article.
1. Organize the Information You Will Publish
Start by listing the content you need, such as headings, descriptions, past work, and contact details. Even if the copy is not finished, keep confirmed and unconfirmed information separate. Prepare photos and logos that you have permission to use.
Our editorial team’s example one-page structure is “What we offer,” “Scope of services,” “Past work,” “How it works,” and “Get in touch.” This is an example to help you think through the order in which visitors make decisions, rather than a universal template. Remove sections your site does not need and replace them with the explanations it does.
Choosing one goal also makes button labels easier to write. Whether you want visitors to read a document or submit an inquiry affects both the explanations you include and where the buttons lead.
2. Build the Overall Site from an Empty Project
In the official introduction, you open the Agent panel in an empty Framer project and describe what you need. Review the generated pages, CMS content, and components, then refine them with further instructions. Official steps for getting started
When reviewing the first result, check that the necessary pages are present and the explanations appear in the right order, as well as checking colors and decoration. When adding missing content, specifying which reader’s question you want to answer gives a clearer basis for decisions than simply asking to “make it better.”
3. Replace Generated Content with Accurate Information
Review the generated text and images and replace them with content that reflects the facts. Our editorial team recommends checking details where errors could affect someone’s actions first, such as prices, locations, figures about past work, and contact information.
Next, examine how the headings relate to the body copy. If a heading makes a big promise that the text cannot support, revise the wording. Refine the content so that first-time visitors can understand what they can ask you to do.
Give each photo a purpose, too. Distinguish between photos that convey a mood and images that show your work, and add captions where an explanation is needed. Attractive visuals alone do not necessarily communicate what a service offers.
4. Organize Repeated Content and Plan for Updates
The official site-building guide explains how to organize text and color styles and reusable components such as buttons. It also covers dividing pages into sections and adapting them to the content. Designing a site that is easy to update
If you plan to add more examples of your work, consider the CMS fields you will need. Our editorial team would start by comparing a case study with a short description against one with a long description. Check that the layout remains readable with realistic text lengths, rather than designing only around an ideal word count.
For fields that might confuse the person responsible for updates, explain what to enter in the project notes. Thinking beyond the finished appearance to whether the next entry can be added to the same standard helps make the site easier to maintain.
5. Follow a Visitor’s Journey in Preview
The official help explains how to open preview using the Play button or a keyboard shortcut. You can check links and layouts while changing the screen width. Preview
When checking the site, choose a visitor goal and work through it instead of simply looking down the page. For example, follow the path “view past work, then find where to make an inquiry” and check whether the necessary links are clear and the buttons lead to the right places.
For smartphone layouts, check heading line breaks, image cropping, elements that overflow horizontally, and the spacing between buttons. If a narrow screen is difficult to read, we recommend adjusting the content order and spacing rather than simply shrinking the text.
6. Set Titles and Sharing Information
Framer explains how to set titles, descriptions, and sharing images for the whole site and for individual pages. Page-specific settings can override the site-wide defaults. Titles and descriptions
Having a large heading on the page is separate from showing the correct title in the browser or when the page is shared. Check that no temporary project name remains and that the description matches the page’s content.
7. Choose Where to Publish and Check the Live Pages
The official instructions explain how to publish a site with Publish and visit the URL shown. Use Update for subsequent changes. When using staging on Pro or above, the test environment and production publishing are handled separately. Publishing explained / Published URLs and domains
When publishing, reopen the pages at their final URLs and check them. Review individual pages, images, and key links as well as the homepage. If any elements cannot be checked in preview, such as code added through settings, verify how they work on the live site.
Our editorial team recommends recording the publication date, the URLs checked, and any remaining fixes. Distinguishing between changes made in the editor and changes reflected on the live site can reduce misunderstandings during updates.
Who It Is—and Is Not—Suited To
In our editorial team’s view, Framer is an option worth considering for people who want to adjust designs visually and build introduction sites or content that will be updated regularly. If you can use AI to create a starting point and then check the information and design yourself, the workflow should be straightforward to try.
However, we do not recommend a workflow in which generated text and links are published without review. For sites centered on custom business processes, you will need to identify the specific integrations and features required, then check how those needs can be met.
If no one can take responsibility for updates after publication, work out how the site will be maintained before adopting it. A site’s usefulness depends not only on building it but also on keeping details such as business hours and prices up to date.
How It Compares with Similar Tools
Webflow also offers a visual canvas, a CMS, and features for publishing and collaboration. Its official website describes an environment that brings together design, content management, analytics, and more. Webflow official website
To compare it with Framer, we recommend using the same page as a test case and trying the process from creating the initial structure through updating text, adjusting the smartphone layout, and publishing. Rather than declaring one universally easier, judge whether the person responsible for updates can use it and whether it meets your feature requirements.
Things to Keep in Mind
What you can check in preview may differ from what you can check on the published site. The official help specifically distinguishes how custom code is applied, so a polished preview does not mean that the site’s behavior after publication has also been verified.
When reviewing costs, consider the site plan, additional editors, AI allowance, and extra features separately. It is important not to rely on old plan names absent from the current pricing table or prices quoted in earlier articles.
When evaluating the design, focus on whether visitors can reach the information they need rather than how much animation it contains. If effects interfere with explanations or navigation, we recommend adjusting them to suit the site’s purpose.
Conclusion
Framer is a service for building websites, updating content through a CMS, and publishing with the help of an AI Agent and an editing canvas. Trying the process of refining content and checking multiple screen widths on a small site can help you decide whether it is right for you.
Treat preview checks before publishing and checks at the published URL as separate steps, and consider who will handle updates and what the required features will cost. Our editorial team recommends defining completion as the point at which visitors can read the information they need and take action.